
- Home
-
-
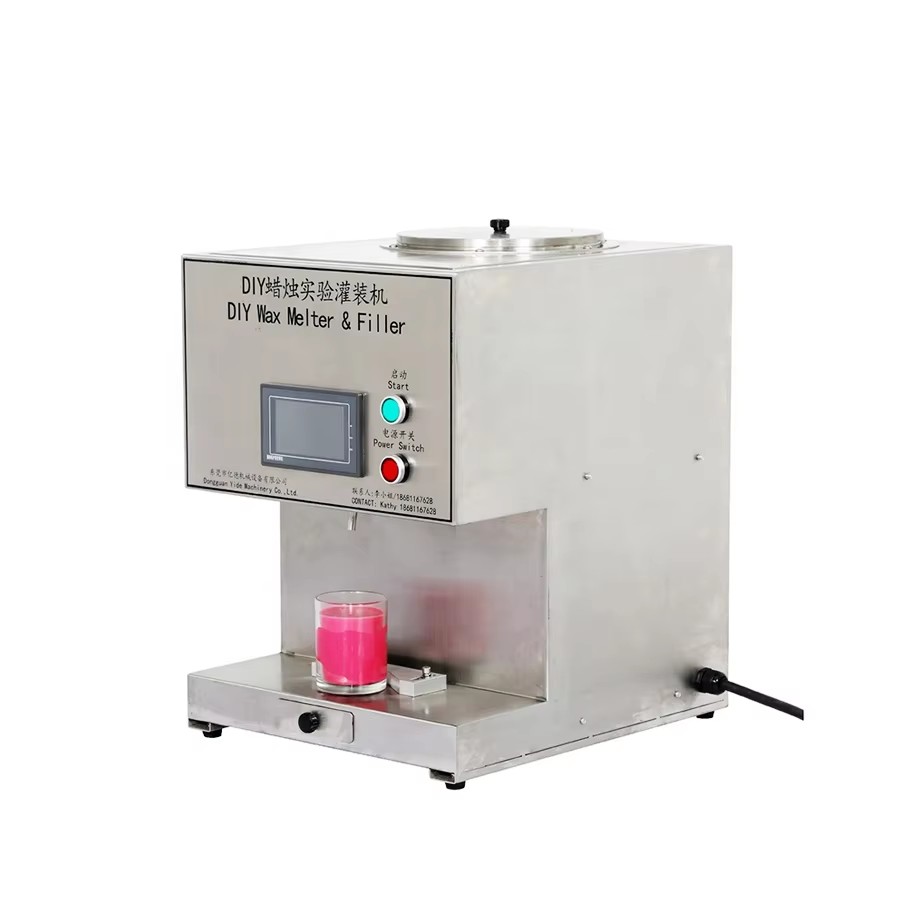
Meet the Yide's DIY Wax Filling Machine

Ever tried pouring melted wax into a jar without spilling, underfilling, or just making a total mess? If you’ve ever made candles at home or in a small lab, you know the struggle is real. But what if I told you there’s a machine that can melt, measure, and fill wax with the precision of a scientist and the ease of a coffee maker?
Introducing the DIY Wax Melting and Filling Machine – your new lab assistant, your candle-making sidekick, and your mess-free wax solution!
What’s in the Box?
Let’s start with the basics. This machine isn’t just a hunk of metal – it’s a smart system built around a PLC control system (that’s like its brain). Here’s what you get:
A PLC controller with a touchscreen interface
Two filling nozzles for double the fun
A stepping motor for precise control
A heating tray to melt your wax
A recycle device to catch drips (because nobody likes waste)
It’s like a high-tech kitchen appliance, but for wax.

Key Specs – The Nerdy Stuff
Before you get too excited, here are the numbers:
Power: 3KW – enough to melt wax fast, but not enough to blow a fuse
Voltage: AC 220V or 110V – works in most places
Filling Volume: 5g to 1000g – from tiny tealights to hefty jar candles
Speed: 5 to 20 jars per minute – you’ll be a candle-making factory in no time
Getting Friendly with the PLC Screen
The PLC screen is your command center. It’s where you tell the machine what to do, how much to pour, and when to stop. Here’s a quick tour:
Operation Screen: Set the filling volume for each nozzle, adjust the interval time between pours, and watch the count of filled jars go up. It’s like a video game, but with wax.
Manual Screen: Want to test the pumps? Reverse the flow? This is your playground.
Calibration Screen: This is where you make sure every pour is perfect. You set a “pulse value,” fill a container, weigh it, and tell the machine exactly how much came out. It’s like teaching the machine to pour like a pro.
Temperature Control Screen: Set the melting temperature for each nozzle. Keep it above 75°C for smooth, bubble-free pours.
How to Use It – Step by Step
1. Pour wax into the melting pot.
2. Set the temperature – just above the wax’s melting point.
3. Set the filling volume – how much wax per jar?
4. Place a jar under the nozzle.
5. Press start – and watch the magic happen.
6. Repeat – like a boss.
Pro Tips & Things to Watch Out For
Before first use: Fill the heating tray with water or heat transfer oil. Run the pump in reverse to clear air bubbles. No bubbles = no problems.
Remote control: Yes, it has one. Unlock it with the green key. Feel like a wax-filling wizard.
If it stops working: Check for clogs, make sure the wax is hot enough, and see if the motor is running.
PLC alarm? Usually means the motor is stuck. Heat it up, wait a minute, restart. Good as new.
Keep It Happy – Maintenance Tips
Ground it – safety first!
Clean the PLC screen with a soft cloth – no alcohol, no scratches.
Don’t fiddle with wires while it’s on – unless you like sparks.
Unplug if not using for a while – save energy and avoid surprises.
What’s in the Box & Warranty Info
You’ll get:
· 1 dispensing machine
· 1 large filling nozzle
· 1 power cord
And yes, it comes with a 1-year warranty on mechanical parts and 6 months on electrical parts. Keep your invoice and warranty card safe – they’re your golden tickets.
Conclusion
Whether you’re a candle maker, a lab technician, or just someone who loves perfectly filled wax containers, this machine is a game-changer. It’s smart, easy to use, and built to last. So go ahead – melt, pour, and create without the mess.
Your wax-filled future awaits!


